My first ikat project: random wrap indigo scarf
December's a weave a month project is a big one... I made an indigo vat, used it to dye resisted yarn, and wove an ikat scarf!
Ikat is a combination dyeing/weaving technique. Instead of printing designs on a finished piece of fabric, you use resists to dye the yarn before it's woven, and the design emerges as you weave. Because of this, ikat designs are kind of "blurry" and the organic edges are what gives it so much charm. I love sewing with ikat fabric and when I started weaving, I dreamed of making my own ikat designs.
This is by no means a fast and easy process! I have pages and pages of notes about wrapping the warp, scouring the yarn, and dying with indigo. Here's my attempt at distilling this info into a coherent project write up.
But first: resources
I would have loved to take an ikat class... instead, I did this on my own and found the following resources invaluable:
Ikat: The Essential Handbook to Weaving with Resists by Mary Zicafoose. This book takes you through the different aspects of ikat, alongside gorgeous images and stories of traditional ikat weavers. It also has a series of projects that build on one another. I always thought that I’d use Rit dye for my first ikat attempts (lol) but the book gave me confidence to create and use an indigo vat.
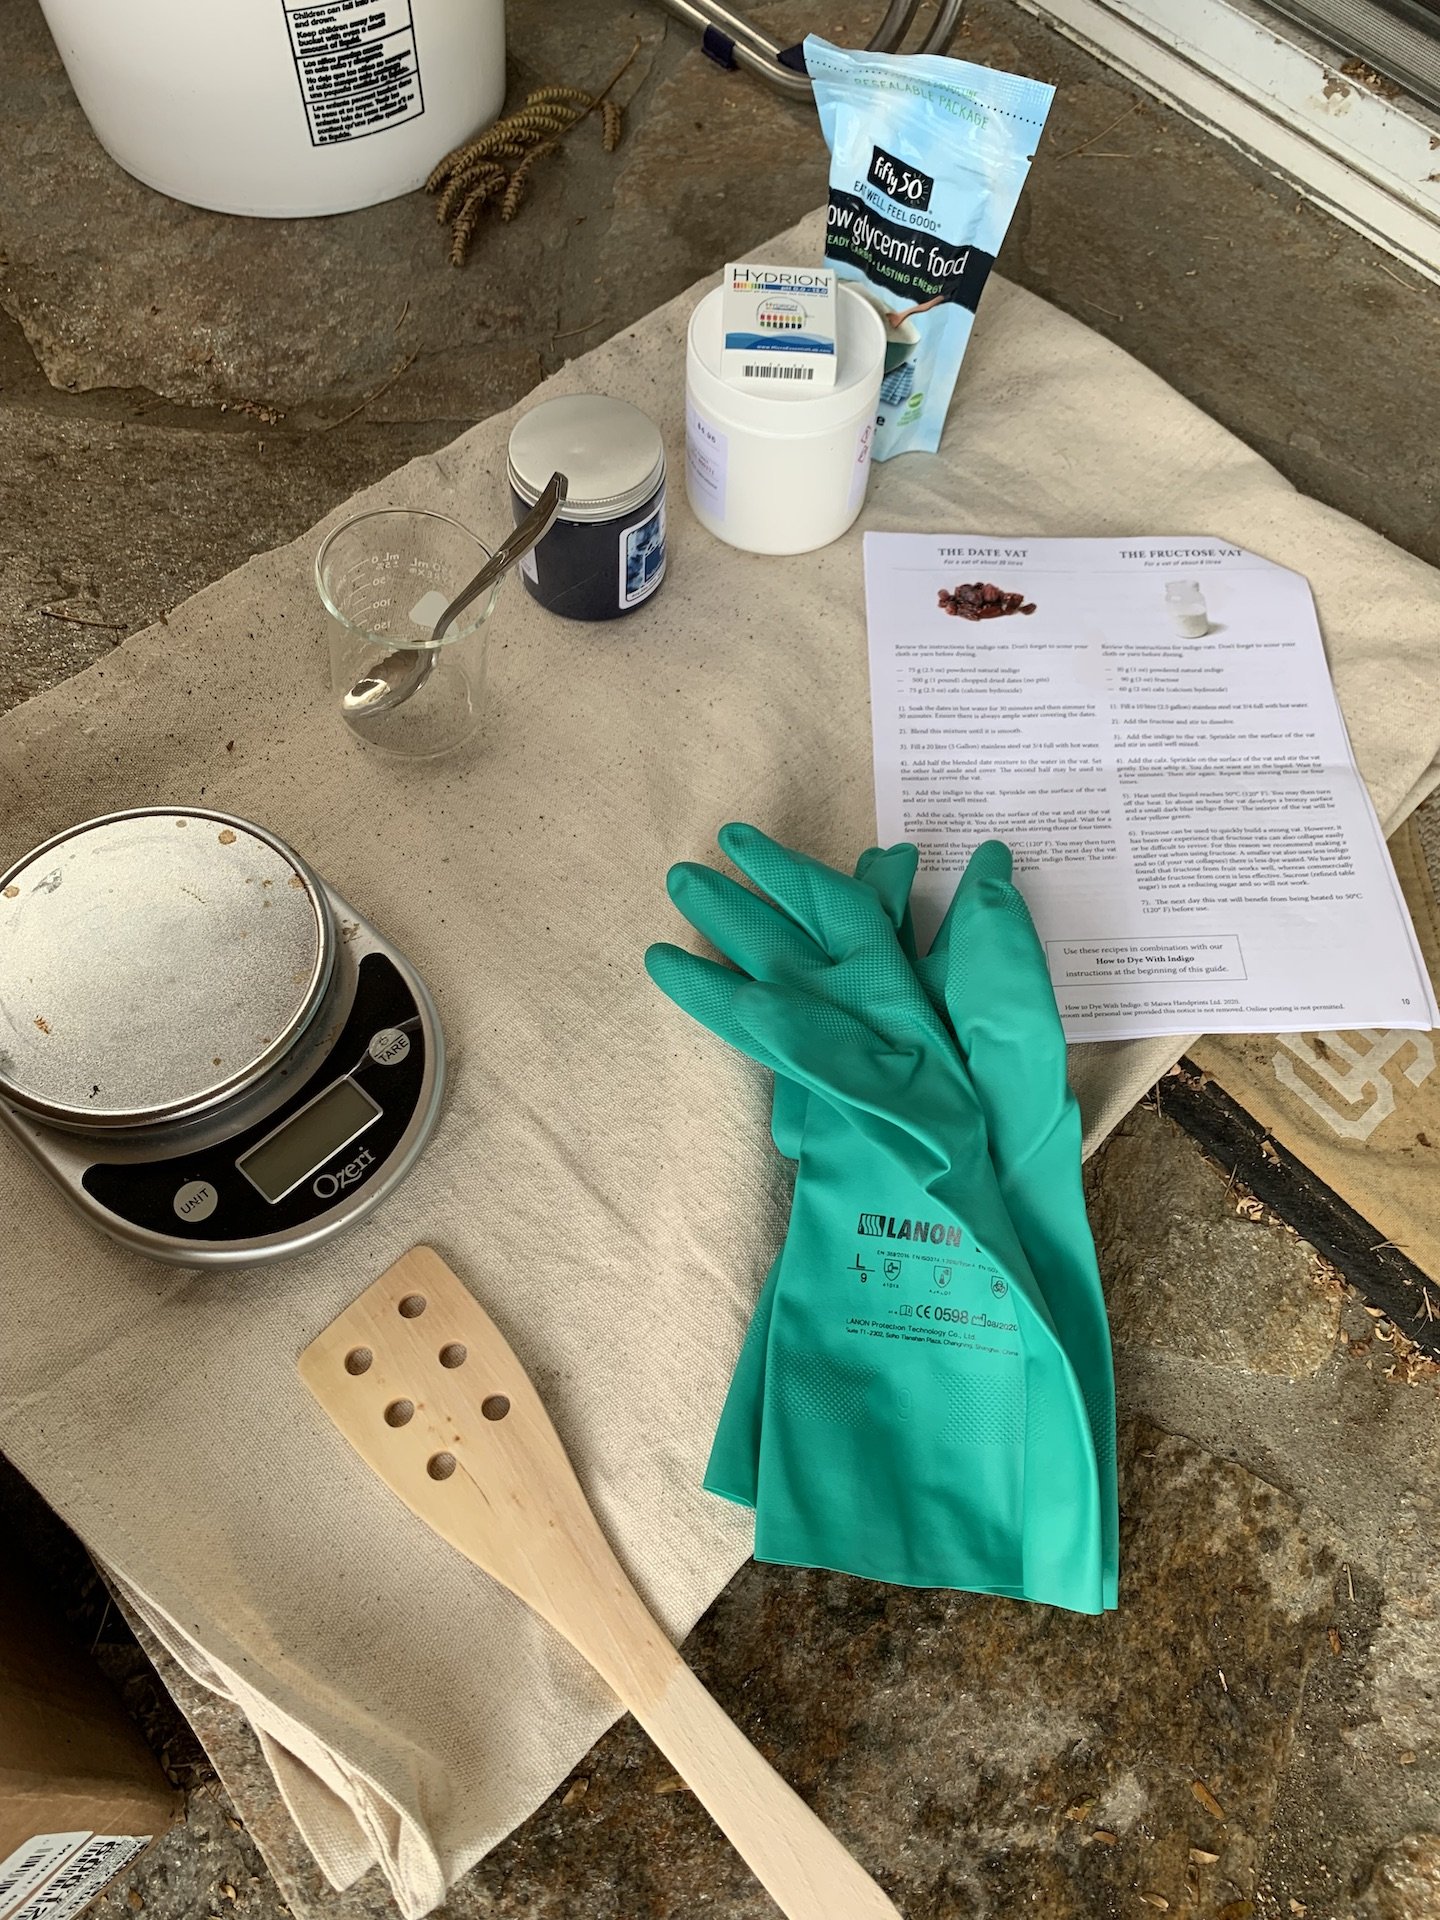
How to dye with indigo — a tutorial by Maiwa. I purchased my indigo from Maiwa. Their resources were immensely helpful in building my vat. I'm also doing their Journey into Indigo class in January, which should be a great complement to my ikat explorations.
More than all you need to know to make your own indigo dye vat by Graham Keegan. I have no idea who this guy is, but I stumbled upon this page via Google and found it helpful in answering questions not covered by the other two resources.
Preparing the yarn: wrapping, scouring, dyeing, unwrapping
This scarf is the first project in my ikat book: Random Wrap Indigo Scarf. It's a great introductory project, focusing on exploring the technique instead of trying to create a specific design. The directions tell you to wrap the warp while it's still on the warping board, and experiment with wraps of different tightnesses, lengths, and thicknesses.
I made a little drawing of my warping board and annotated it with my intention for each wrap. I especially wanted to experiment with tight vs. loose wraps to see how it would look if dye wicked under the cellophane. However, it turned out that all my wraps, except for the one I labeled "mega-loose," were very tight! I guess that's better than having them all be too loose and not blocking the dye at all?


Once the warp was complete, I had to wind the weft yarn into skeins and scour both to prepare them (aka clean the yarn so it would be ready to accept dye). I used black contrasting yarn to help secure the yarn in various places so it wouldn't shift and tangle in the scouring/dye baths. Turns out the yarn scraps I used for ties were not colorfast in boiling water (oops!). A lesson for next time.
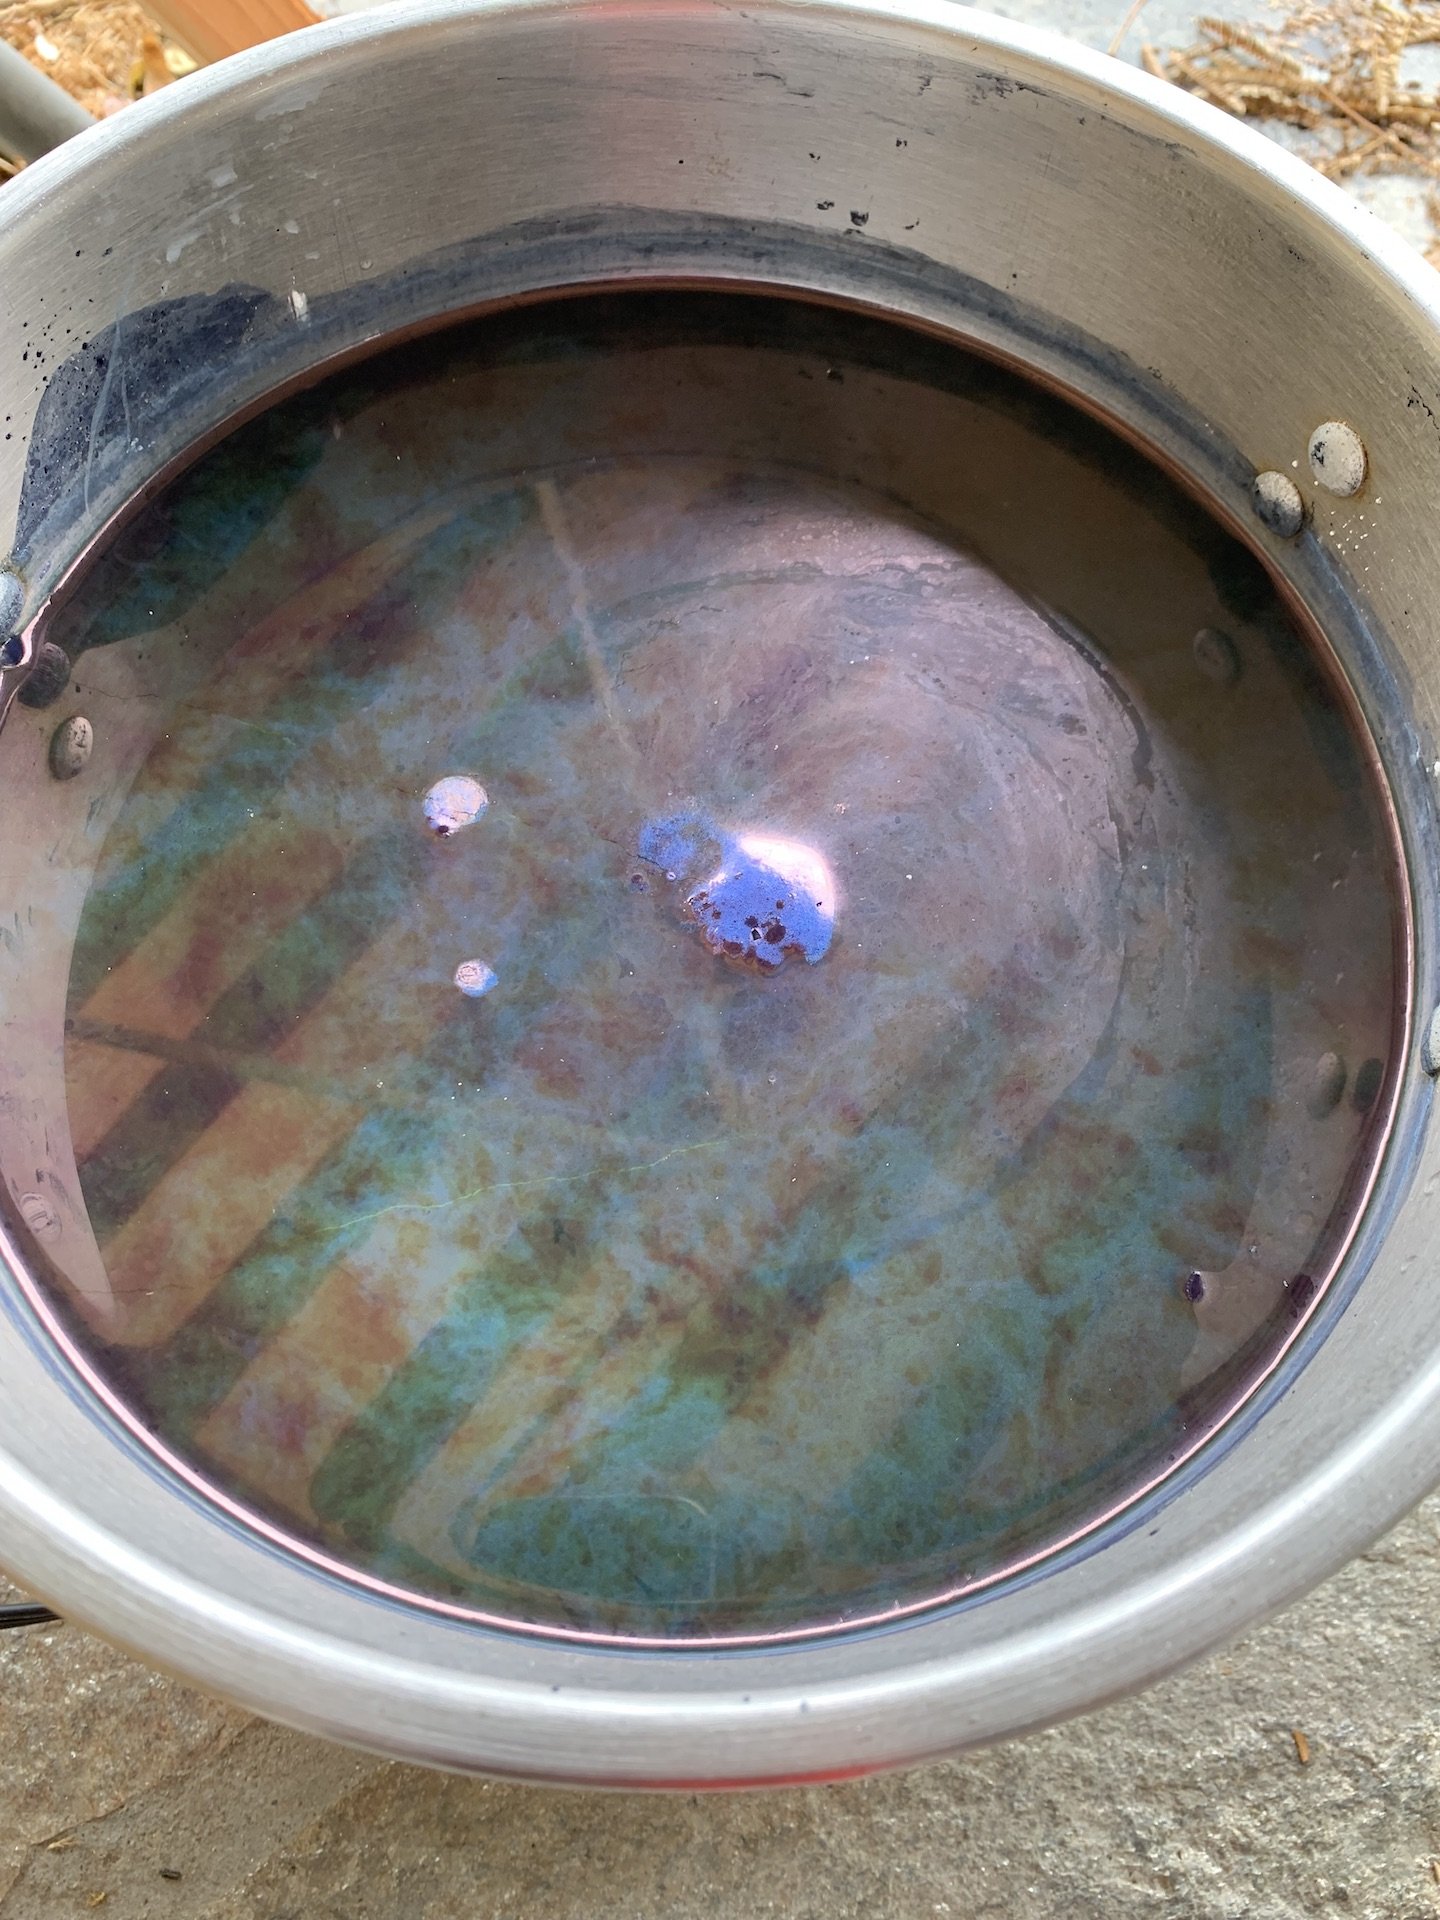
It was very cool seeing the indigo at work. The yarn had a yellow/green tint when first coming out of the vat. As it hung on the drying rack, it slowly changed color. The warp (white cotton) oxidized relatively blue; the weft (natural silk) always had a teal look to it.
Overall, I did 4 cycles of dipping and oxidizing. For simplicity, I soaked and oxidized for ~20 minutes each, and alternated between dipping the the warp and weft yarns.
I was absolutely floored when I unwrapped the cellophane to see pure white yarn under the wraps! I half expected them not to hold at all. But in fact, the resists held until the very end when I was rinsing off the remaining dye.

About the indigo vat
I can't say I'm completely sold on dyeing. It's a means to an end for me instead of an end itself. However, you can't make your own ikat without hand-dyeing yarn so I'm reluctantly dipping my toes into the process.
I made a fructose vat for this project since it used both cellulose and protein fibers. I started the vat and dyed the yarn all in the same day. It clearly worked, but I'm thinking the process was too quick? There was a ton of sediment in the vat when I started — it looked very similar to how miso looks when suspended in water, except violently yellow (!). Next time, I'm going to let the vat sit until the liquid is clear. And also measure and monitor the ph values.
Weaving (the easiest part of this process!)
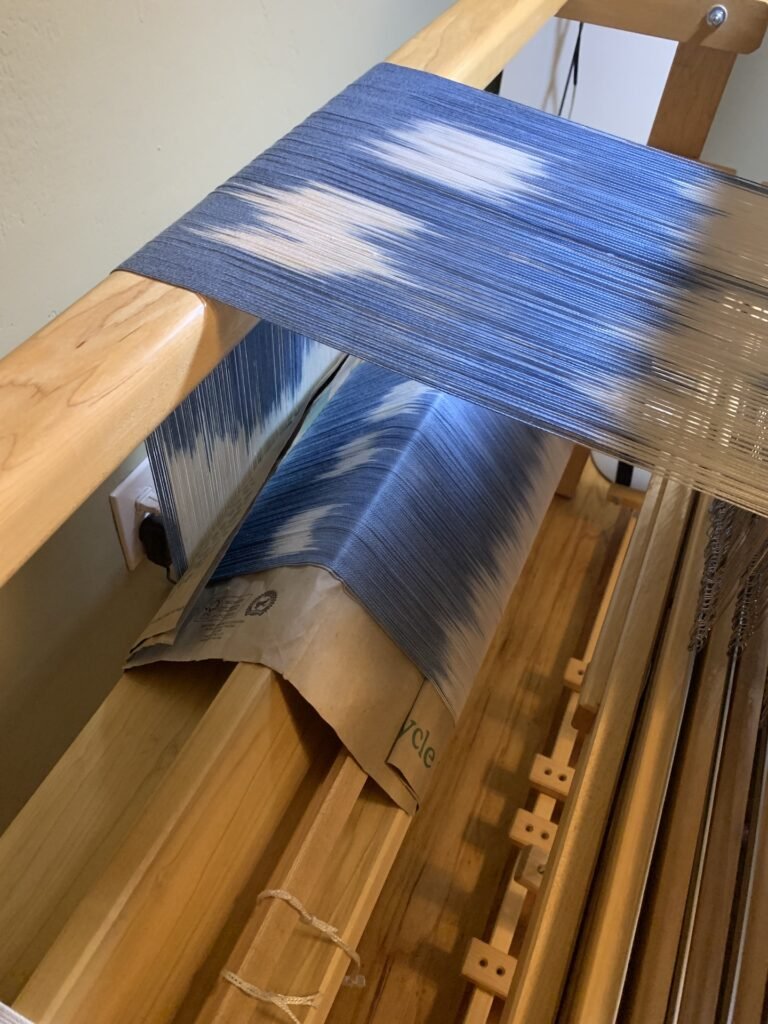
Both the warp and the weft yarns got a little tangled and curled as part of the dying process. The weft yarns in particular looked almost unsalvageable. However, I was able to wind them into balls with minimal breakage by "snapping" the hanks (like you when warping the loom) to tidy them before putting them on my swift. For the warp, I dressed my loom from front-to-back and ran it though the reed/heddles twice; the first time to help smooth out the tangles, the second to focus on getting consistent tension on the yarn. For my next project, I'm going to investigate additional ways of yarn management for the dye bath. Maybe adding more ties, but also tying them looser to prevent unintentional resists (which definitely happened for my weft!).
You can also see the difference in final color between the warp and weft yarns. I'm not sure why the silk was so teal. Perhaps it had to do with starting from a "natural" color instead of white, or maybe some interaction between the fiber and the dye bath.


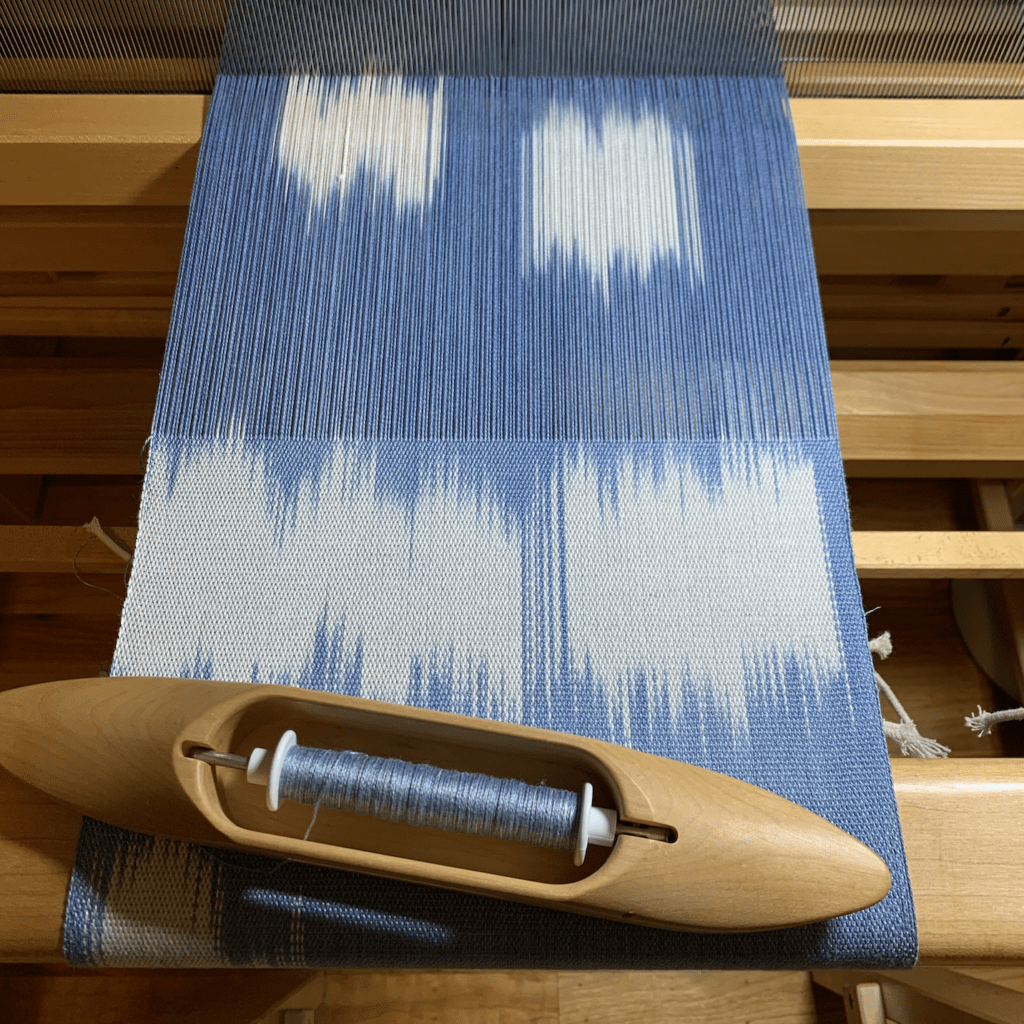
I wove this in a simple warp-faced plain weave. I did have some issues keeping the shed clear — maybe due to the density of the warp, or inconsistent tensioning.
I also started and finished this project with a simple hemstitch on the loom. It made the fringe look much cleaner than on my previous projects and it's something I plan to do for all my future weaves.
Final results & weaver's notes
The warp faced weave and heavy cotton warp yarn means a thick, stiff-ish fabric: it feels more like a bottom weight than a comfy scarf. I'd say it's more of a proof of concept than a finished object I'll actually wear. Please enjoy this dorky selfie as I attempt to photograph the entirety of this massive scarf.

It's fun looking at the various sections and seeing how they turned out. A few notable ones:
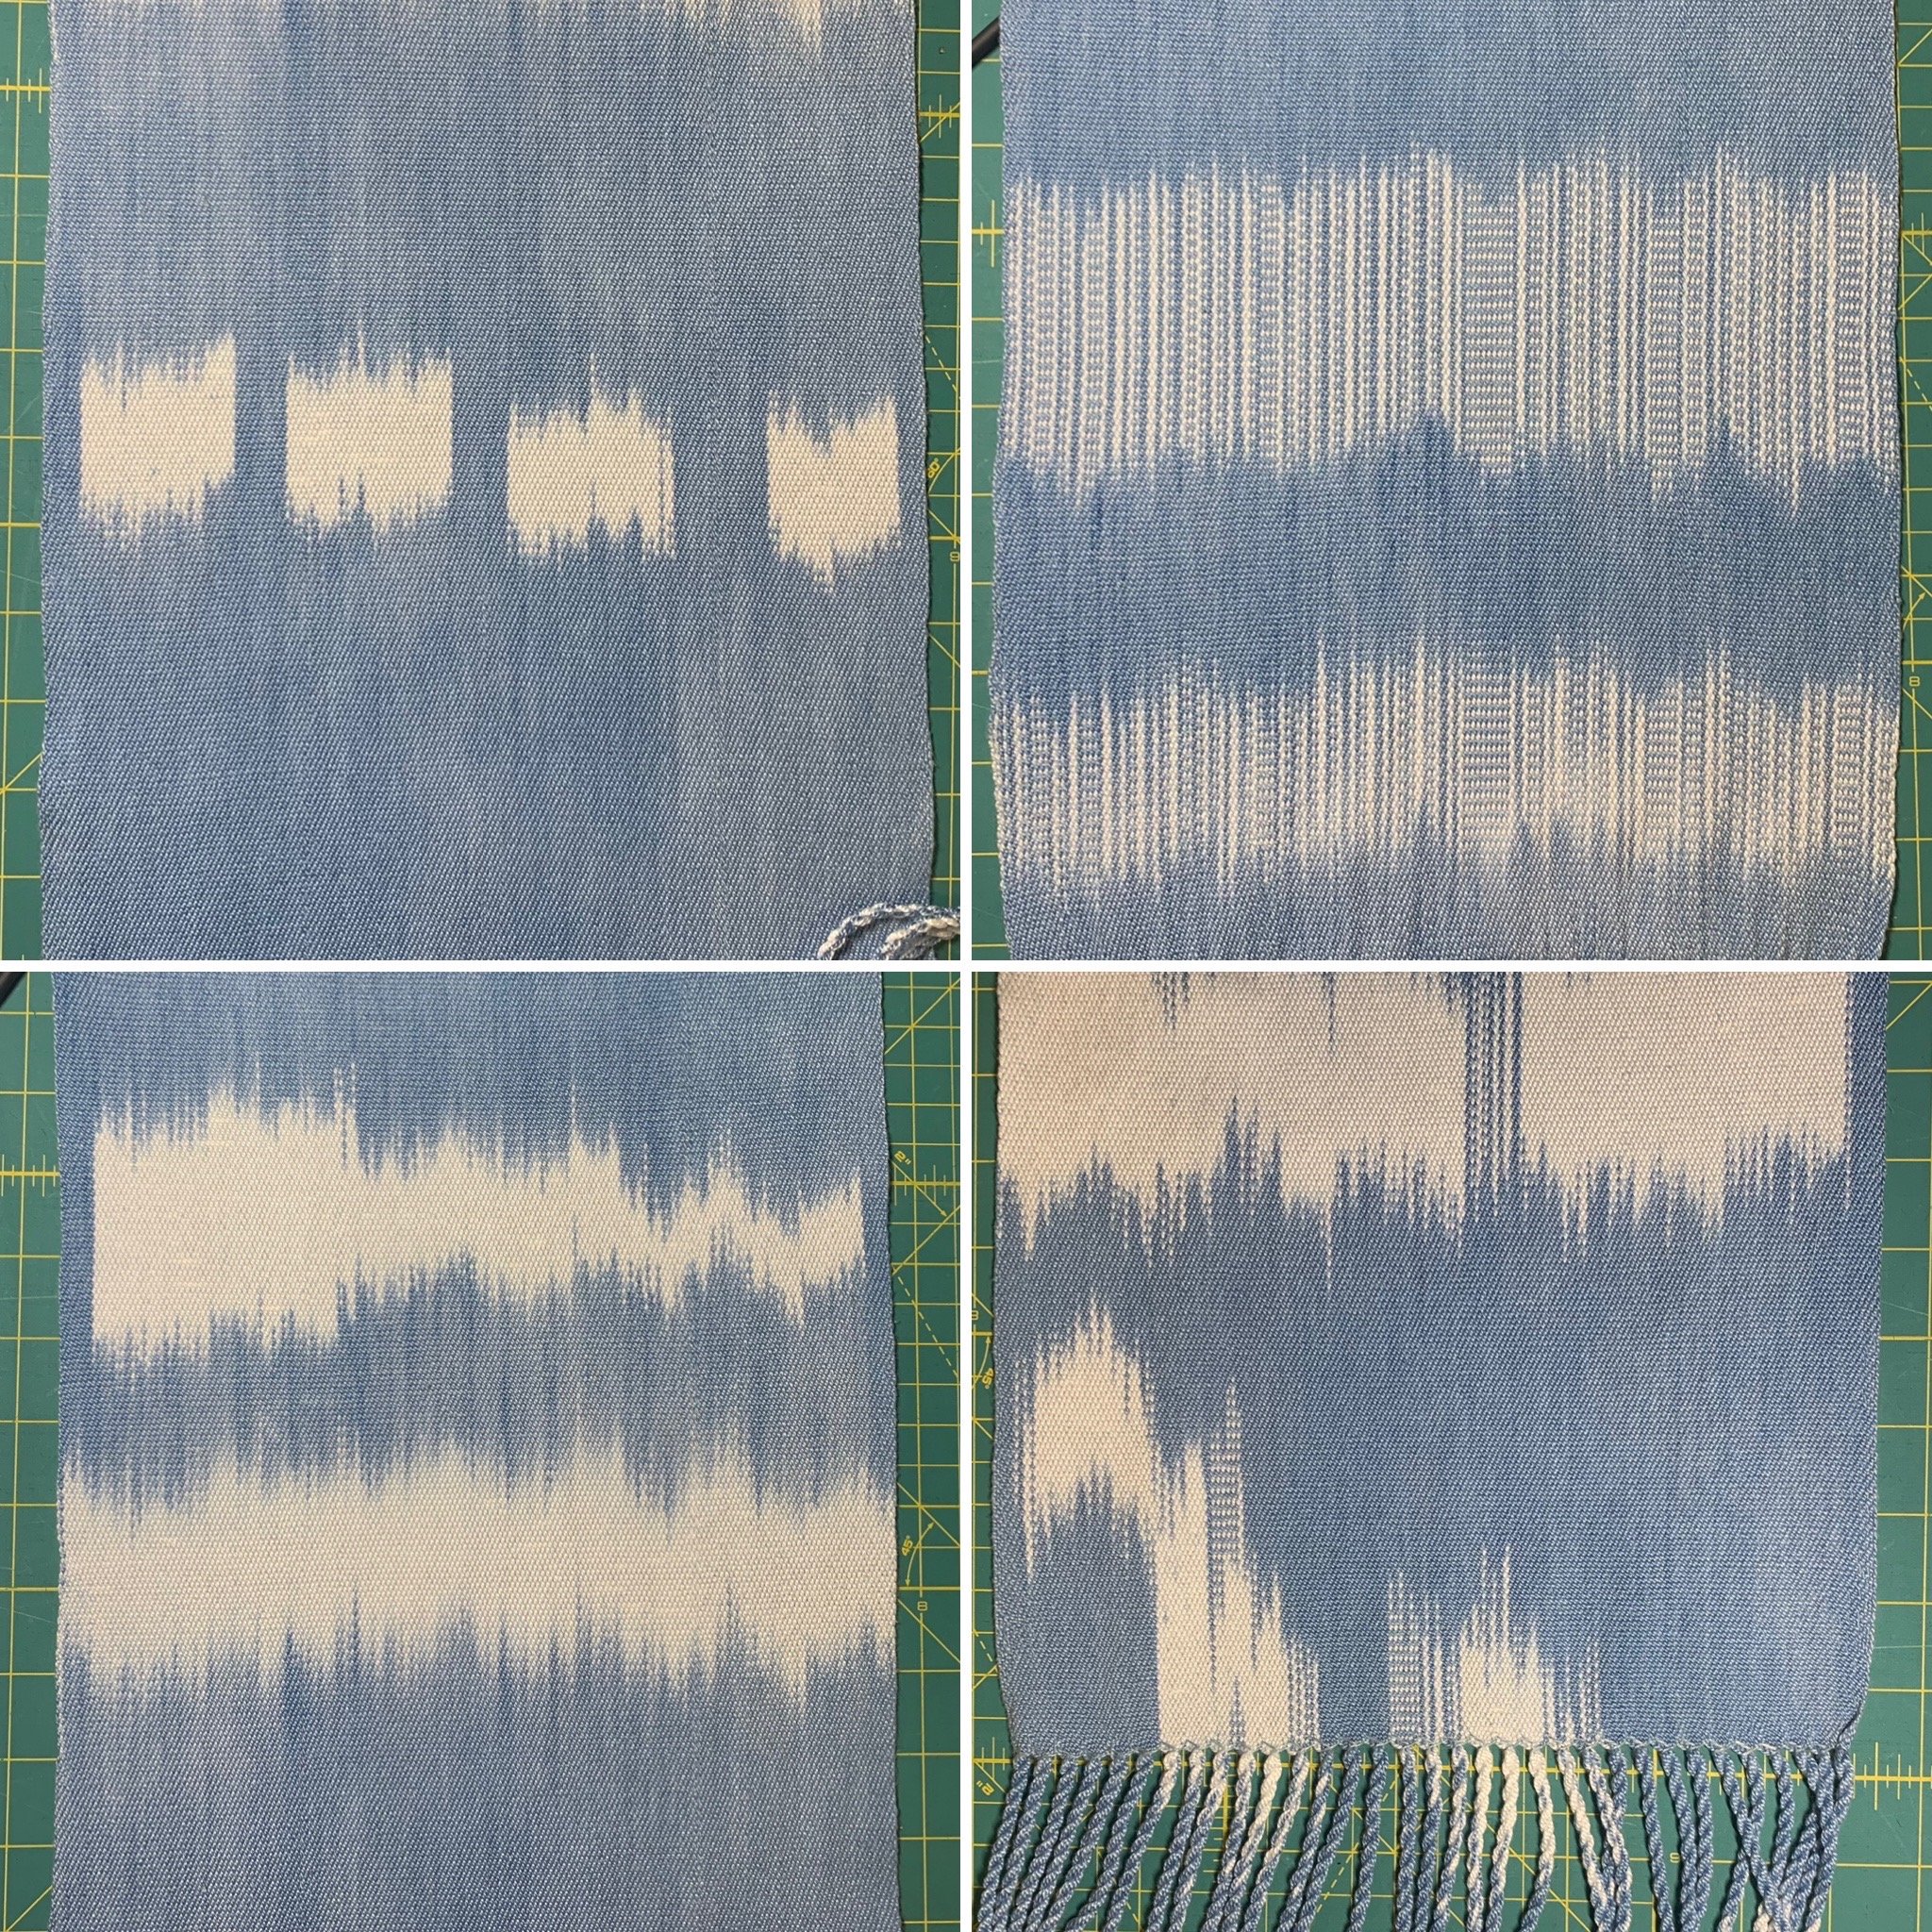
Clockwise from the top-left:
4 squares — this one turned out pretty well!
Here, I wrapped only one side of the cross. This is probably my least favorite section but it creates kind of an interesting mismatch.
The bottom stripe on this image was my "mega-loose" section. I love how the edges are fuzzy. I also like how the dye is patchy between the two stripes.
This small section at the bottom is my FAVORITE part of the scarf. Going to try more curves on my next project.
To wrap up, some standard weaving notes:
Sett: 30 EPI, 3 per dent in a 10 dent reed
PPI: 16 on the loom
Warp length: 3 yards
Yarn
Warp: 5/2 pearl cotton, white
Weft: 30/2 silk, natural
Weave structure: Plain weave
Total ends: 330
Fringe: Hemstitched on the loom in groups of 10 ends, trimmed edges to 7″ then hand twisted two-ply fringes
Measurements On loom / Off loom / Post-washing
Width: 11" in reed / 10.75" / 10.5"
Length: n/a / 76" / 72"